
Introduction
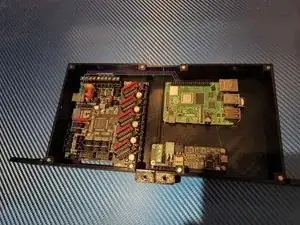
I wanted to try and keep everything as neat as possible while reusing as many of the original components as possible. I wanted the RPI to remain hidden. I came up with a design that uses the existing are the motherboard was installed in but also eliminates the tool drawer. Believe it or not this was a hard choice because as simple as the tool drawer was I really liked that they incorporated it.
I recommend you do not install the SKR3 EZ and RPI into the printer until the firmware flashing is complete.
-
-
Download and extract the latest version of Mainsail from their Github
-
Open the Raspberry Pi Imager
-
Select Operating System > Use custom > Select the Mainsail OS you downloaded.
-
Select Storage > Select your SD/USB.
-
Bring up the Advanced Settings menu by pressing CTRL+SHIFT+X
-
Here you can setup your WiFi, locale, enable SSH and numerous other options.
-
Write > Yes to confirm
-
After imaging is complete the SD/USB is automatically ejected. Insert it into the RPI.
-
-
-
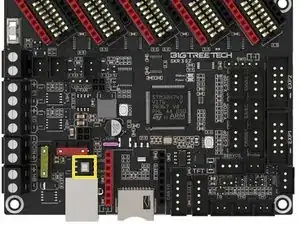
Connect your Raspberry Pi to the SKR3 EZ by USB or UART cable. I used a UART cable so that is what I will be showing but I'll try to explain how to setup USB as well.
-
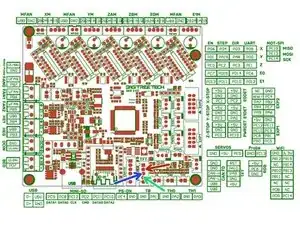
UART wiring
-
PA10 > GPIO15
-
PA9 > GPIO14
-
GND > GND
-
For USB ONLY connect a USB cable from the SKR3 EZ to the RPI and place a jumper on VUSB
-
Make sure the double throw switch is in the up position
-
Connect the RPI to it's 5v power supply and power it on. Do not power on the the 24v PSU
-
-
-
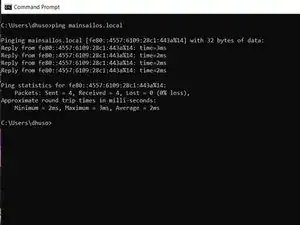
Verify the RPI is connected to your network. Open command prompt and run
-
ping mainsailos.local
-
You should see it return successful pings
-
Open a web browser and go to
-
mainsail.local
-
On the machine tab you can see the IP address of your RPI next to "wlan0"
-
I use Remote Terminal, but using your favorite SSH client login to your RPI with the default credentials
-
-
-
Set your locale
-
sudo raspi-config
-
Set your region preferences for L1-L4
-
Reboot your RPI when finished
-
-
-
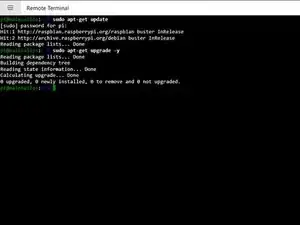
SSH back into your RPI and run
-
sudo apt-get update
-
sudo apt-get upgrade -y
-
Because I used a brand new image (released the day before) there was nothing to update. If yours installs updates make sure you restart the pi
-
-
-
SSH into your pi and run
-
cd ~/klipper
-
make menuconfig
-
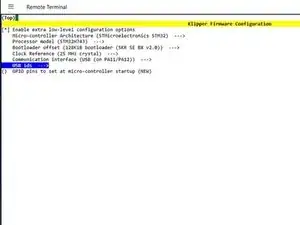
Set the following parameters
-
Enable extra low-level configuration options
-
Micro-controller Architecture (STMicroelectronics STM32) --->
-
Processor model (STM32H743) --->
-
Bootloader offset (128KiB bootloader (SKR SE BX v2.0)) --->
-
-
-
Continued
-
Clock Reference (25 MHz crystal) --->
-
3 wire cable connected from TFT to RPI GPIO
-
Communication interface (USART1 (on PA10/PA9)) --->
-
USB Cable
-
Communication interface (USB (on PA11/PA12)) --->
-
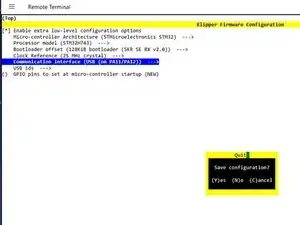
Press ESC key
-
Y to save configuration
-
-
-
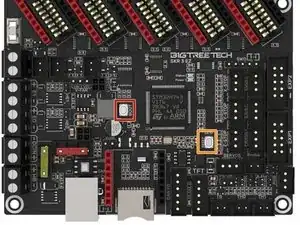
Press and hold the BOOT and RESET buttons.
-
Release the RESET button first, than release BOOT. This will put the board in DFU mode.
-
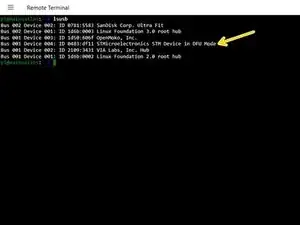
Get the boards ID number by running
-
lsusb
-
-
-
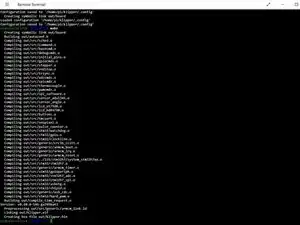
Compile the firmware by running
-
Make
-
The SKR3 doesn't have a bootloader so you cannot flash it from the RPI. You'll need to use the SD method.
-
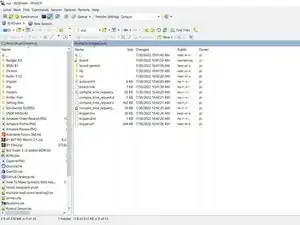
Open WINSCP
-
Navigate to /klipper/out/
-
Copy klipper.bin to your PC and rename it to firmware.bin
-
Copy firmware.bin to a SD. I used a 128mb one I had laying around
-
Holding the RESET button on the SKR3 EZ, insert the SD card into the SKR3 EZ.
-
-
-
Release the reset button and the firmware will update. When the status LED goes out the firmware update is complete.
-
Remove the SD card and press the RESET button.
-
FOR USB CONNECTED ONLY
-
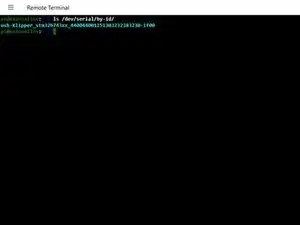
You need to get the boards ID. Run
-
ls /dev/serial/by-id/
-
Reboot the RPI
-
-
-
Power on the RPI and SSH into it.
-
Run
-
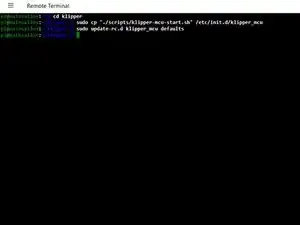
cd ~/klipper
-
sudo cp "./scripts/klipper-mcu-start.sh" /etc/init.d/klipper_mcu
-
sudo update-rc.d klipper_mcu defaults
-
sudo service klipper stop
-
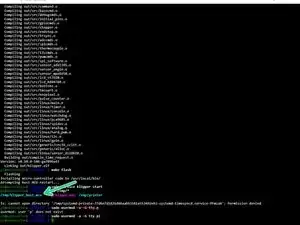
make clean
-
make
-
-
-
Continued
-
make menuconfig
-
Micro-Controller Architecture > Linux Process. Press esc than Y
-
make flash
-
sudo service klipper start
-
Verify klipper_host_mcu is in the tmp directory with ls /tmp/*
-
Add the pi to the TTY group
-
sudo usermod -a -G tty pi
-


4 comments
is it suitable for skr 3 but NOT EZ version?
that saved my life, thx
Balint V -
is it different for a btt pi4b with cb1 emmc 32g