Introduction
-
-
Using 3x M3x18mm socket head screws mount the Left Bottom X 2020 mount to the Left Y MGN mount. Do not tighten. Make sure you pay attention to the mounts. There will be a L for Left and R for right. The picture shows I used button head screws. I noticed I used the wrong ones after the picture was taken
-
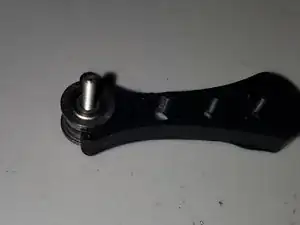
Using a spare M3 screw slide on a F623ZZ bearing+M3 washer+F623ZZ bearing and insert it into the bearing tool. Once the bearings snap into the tool you can remove the M3 screw
-
You will need 2 bearing assemblies per side so it would be wise to print 2 bearing tools.
-
-
-
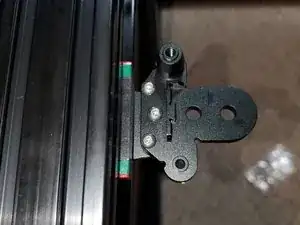
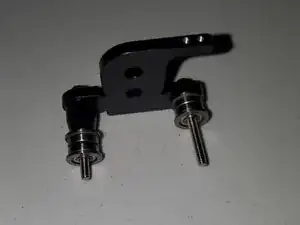
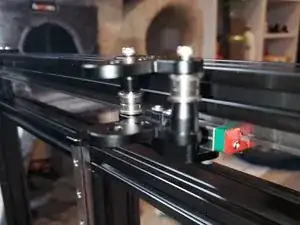
Insert 2x M3x30 button head screws into the Left Top X 2020 Mount. Make sure you pay attention to the mounts. There will be a L for Left and R for right.
-
Insert a bearing assembly onto both M3x30 screws
-
Take the Left Top X 2020 mount+bearings and thread the M3x30 button head screws enough so the threads catch into the bottom mount
-
-
-
These steps are the same as for the Left. During my last build I had issues getting the X beam to line up which is why I did it this way
-
Mount the Right Bottom X 2020 mount to the Right Y MGN mount with 3x M3x18mm socket head screws. Do not tighten.
-
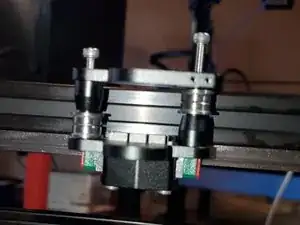
Insert 2x M3x30 button head screws into the Right Top X 2020 mount than slide 2 bearing assemblies onto the screws
-
Thread the 2x M3x30mm button head screws until the threads catch into the Right Bottom X 2020 mount
-
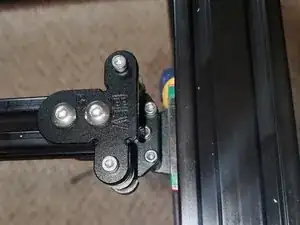
Both Left and Right top mounts should be free to move up and down with the screws threaded into the bottom mount.
-
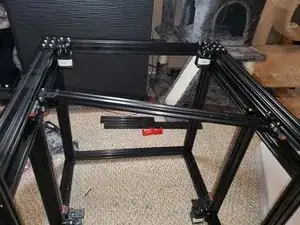
Slide the Left assembly back and the Right assembly forward(See picture)
-
Slide in the 460mm 2020
-
-
-
Slide the Left assembly back and the Right assembly forward(See picture)
-
Slide in the 460mm 2020 into the X mounts. Move the Left mount forward and the Right mount back at the same time and the 460mm 2020 should drop into place.
-
Insert 2x M5x8mm button head screws + M5 T-nuts into the top and bottom of both sides but do not tighten.
-
-
-
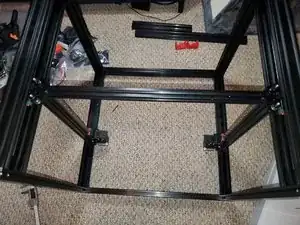
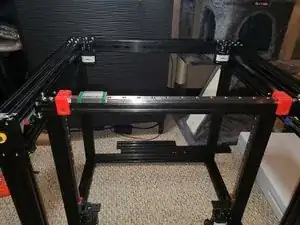
Using 2x M5x8mm screws secure an internal corner clamp into the channel next to the Y linear rail at the front of the frame for both sides. The purpose of this is to use the corner as an alignment block.
-
Slide the Y MGN mount and using a compression clamp clamp the front mount to the front of the printer as seen in the picture. Do this for both Left and Right sides
-
Once both sides are clamped tighten the 6x M3x18 socket head screws, the 4x M3x30 button head screws and the 8x M5x8mm button head screws
-
-
-
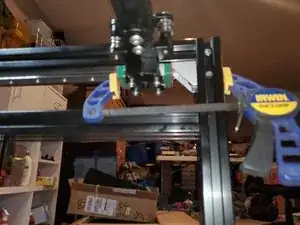
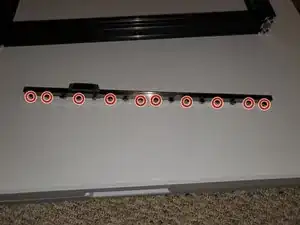
Insert 9x M3x8 socket head screws and thread into 9x M3 T-Nuts. Align the T-Nuts so they drop into the 2020 channel.
-
Using 2 2020 Linear Rail jigs start at one end of the linear rail and work your way from left to right tightening the M3x8 screws until they're snug.
-
Than working right to left tighten the screws another 1/4 to 1/2 turn
-


I wasn’t paid to write these guides. Ben asked me to do it as a favor to him. Considering all that he’s done for our community I felt it was the least I could do. To be honest even though it took about 2 months to build and document, I had a lot of fun doing it. It forced me to write guides in a manner that was easy for everyone to understand and cleanup my Github so I could share any files that were used that aren’t part of the original download. You’re not obligated but if you would like, feel free to donate.