Introduction
-
-
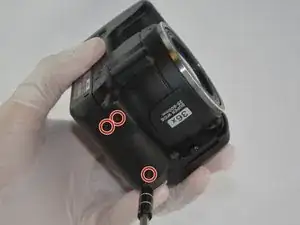
Remove the M3 x 4mm screws from the bottom of your device as indicated by the picture. using the Philips Head J0 Screw Driver Bit .
-
-
-
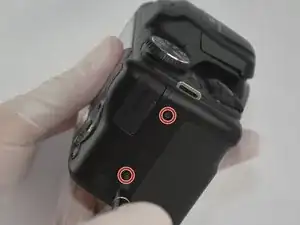
Use your Philips Head Screwdriver to remove the M3 x 4mm screws from the left side of the device as indicated by the pictures.
-
-
-
Use your Philips Head Screwdriver to remove the M3 x 4mm screws from the right side of the device as indicated by the pictures.
-
-
-
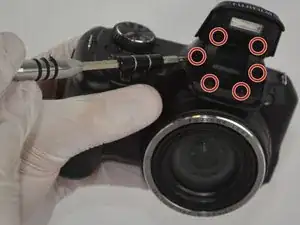
Use your Philips Head Screwdriver to remove the M3 x 4mm screws from the camera flash lid as indicated by the picture.
-
Remove the plastic cover from the flash lid by gentle pulling them apart or using the plastic opening tool.
-
-
-
Fold the lid down in order to access and remove the final M3 x 4mm screw using your Philips Head Screwdriver.
-
-
-
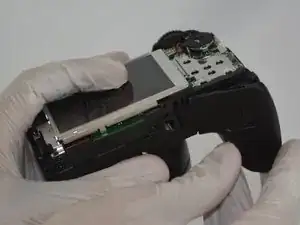
Use the plastic opening tool to pry the back and front casings of the camera apart.
-
Once pried apart use your hands to pull off the back plate of the camera.
-
You will need to apply a little bit of force to remove the back plate.
-
-
-
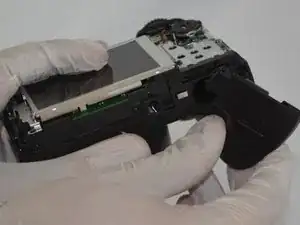
Once the back plate is removed twist the battery cover clockwise and it should easily dislodge.
-
-
-
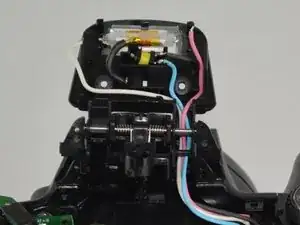
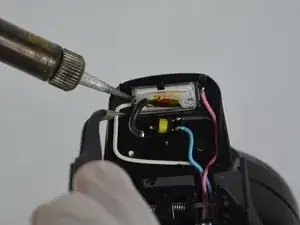
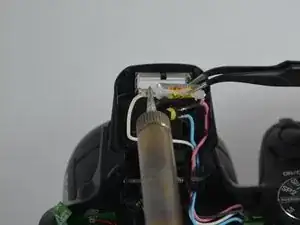
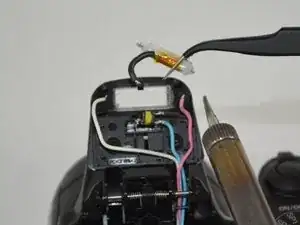
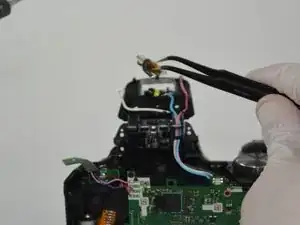
Unsolder the connections shown in the image that connect the black, pink, and blue wires to the bulb.
-
Soldering Guide: How To Solder and Desolder Connections
-


To reassemble your device, follow these instructions in reverse order.
One comment
How do you discharge the capacitor on this model?