Introduction
-
-
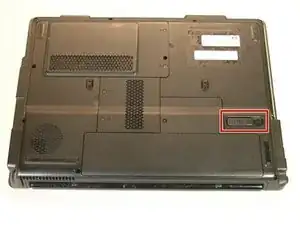
Make sure the laptop is powered OFF. Gently turn the laptop over and place it on a flat surface.
-
Locate the battery EJECT latch.
-
-
-
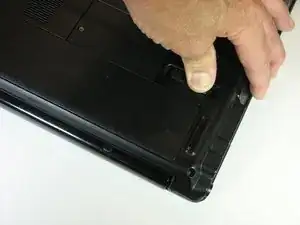
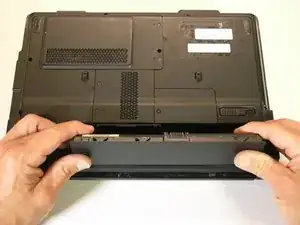
Grab the laptop firmly on the side and using your thumb, press the eject latch towards the OUTER edge of the device.
-
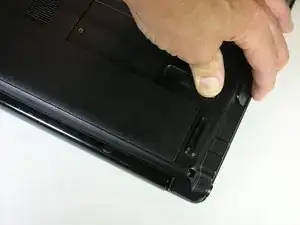
The battery will be lifted out of the laptop slightly as you press the latch over as far as it will go.
-
-
-
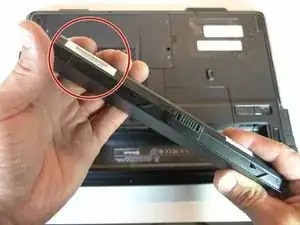
Pull the battery up and towards you to remove it from the laptop chassis.
-
Once the battery is out, you will be able to check the battery label for the replacement part number.
-
-
-
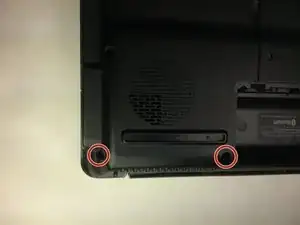
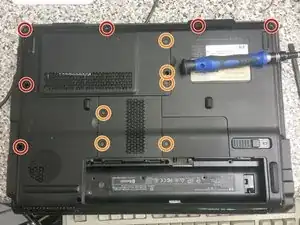
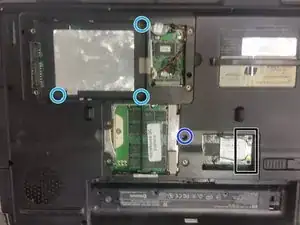
Use a Phillip's #00 screwdriver to remove all of the circled screws. Apply moderate pressure to each screw to avoid stripping it.
-
The three screws circled in red are 9mm Phillip's #00 screws.
-
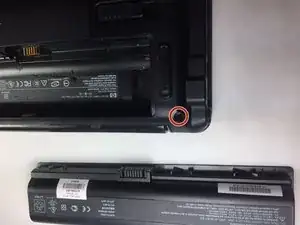
The three screws circle in orange are 5mm Phillip's #00 screws.
-
The three screws circled in yellow are 6mm Phillip's #00 screws.
-
-
-
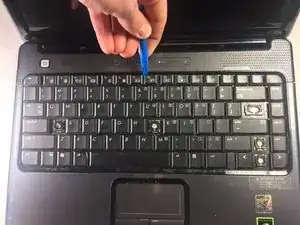
Insert the rubber spudger gently below the edge of the keyboard.
-
Lift the keyboard vertically to detach it from the top assembly.
-
-
-
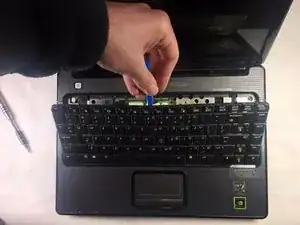
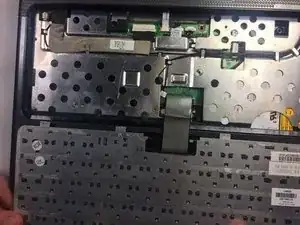
Flip the keyboard over. It may be easiest to hold it up in order to detach its wire assembly.
-
-
-
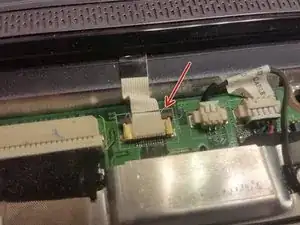
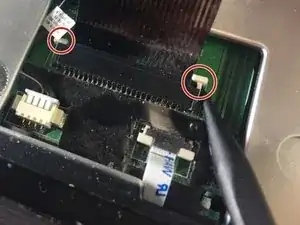
Use your plastic spudger to unlock the two white sliding connectors located on the left and right side of the device by gently pushing them out.
-
-
-
With the white sliding connectors unlocked, gently grab the connector power cable and pull it out.
-
-
-
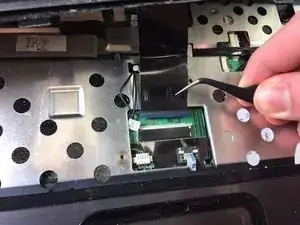
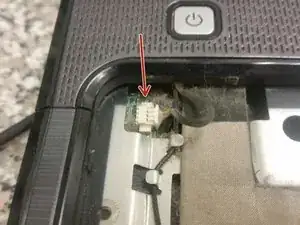
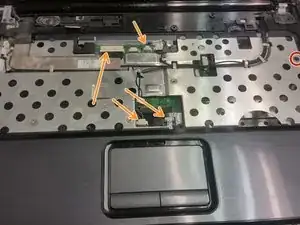
Remove both the media button and power button cables from the motherboard.
-
Pull up on the edges of the power button cover with your fingers to remove it.
-
-
-
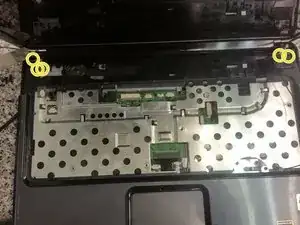
Remove the six screws securing the palmrest to the base.
-
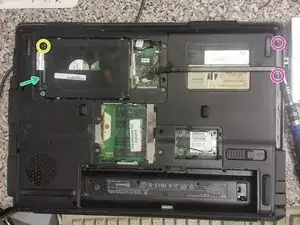
Remove all three covers, as well as the screw securing the optical drive. Pull the optical drive out.
-
Remove the single screw securing the hard drive caddy.
-
Remove the two screws from where the optical drive was.
-
Lift the hard drive caddy out of the laptop.
-
Remove the three screws from under where the hard drive caddy was.
-
Remove the single remaining screw holding the palmrest from the bottom.
-
Also remove the wireless antennas from the wireless card, as well as the wireless card.
-
-
-
Remove the single remaining screw securing the palmrest.
-
Remove all cables from the motherboard, and pull them from their clips.
-
Remove the five screws securing the screen assembly. Take care to support the LCD assembly as you unscrew it. Pull it up, then set it aside.
-
Use a spudger along the back of the computer to completely separate the palmrest from the base. Lift the palmrest up.
-


To reassemble your device, follow these instructions in reverse order.

2 comments
Thank you. I followed your guide successfully.
Trung -
Hi,
Knowing About Websites & Manufacture Companies.
Thanks