
Introduction
If your speaker is experiencing trouble charging or if the USB port seems loose, electrical connections for power may have been damaged. A USB port replacement may be necessary. This guide walks you through on removing the USB port.
-
-
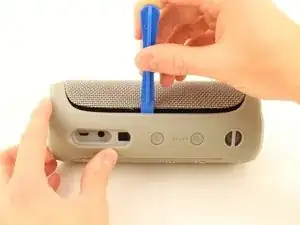
Insert the plastic opening tool in the crack in between the cover and the rubber spine with the power button.
-
Pry off the cover, beginning with the side without the volume and bluetooth buttons.
-
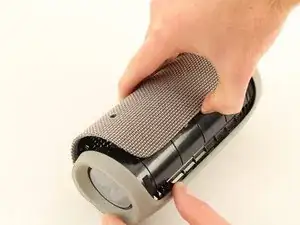
Pull the cover off with your thumbs.
-
-
-
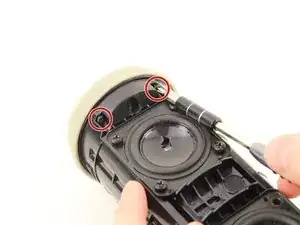
Remove four 13 mm JIS #0 screws attaching the rubber spine to the speaker, located on both sides of the inside of the speaker.
-
Use the plastic opening tool to release the clips holding the central part of the rubber spine.
-
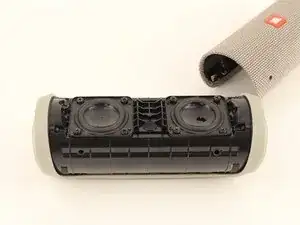
Pry away one end of the rubber spine with your thumbs and it should come off.
-
-
-
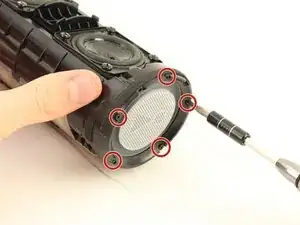
Remove the four 9mm Phillips #1 screws holding the gray USB port.
-
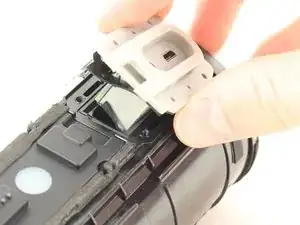
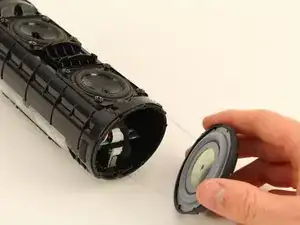
Loosen the USB cover's gray casing using your hands.
-
-
-
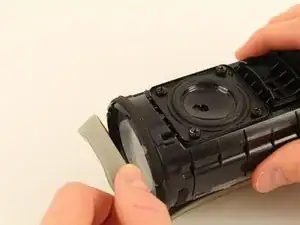
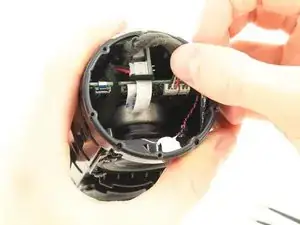
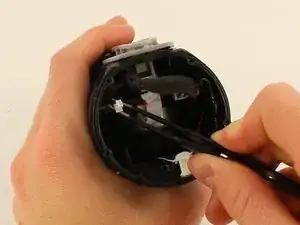
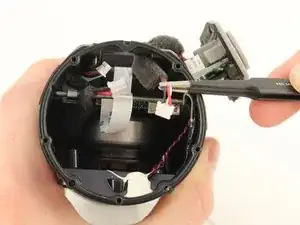
Pull the wire coated with dark gray foam out from the space where it is tucked and move it out of the way.
-
-
-
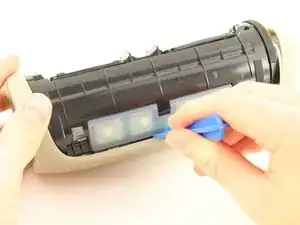
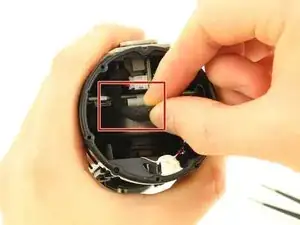
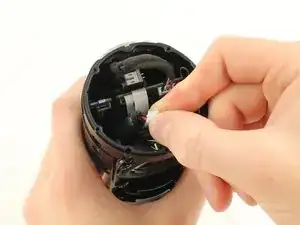
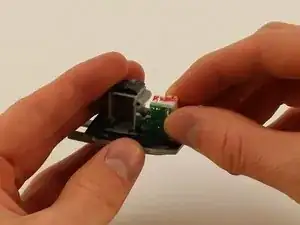
Unhook the white plug attached to the small circuit board hanging from the gray micro USB casing using the ESD Safe Blunt Nose Tweezers.
-
Move the plug out of the way by pulling it through the gap in the large circuit board to get to the next plug behind it.
-
-
-
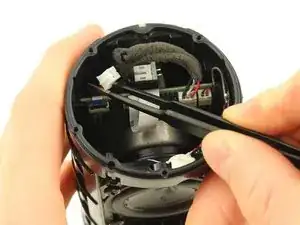
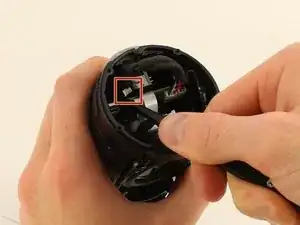
Unhook the other smaller white plug behind the previous plug from the same small hanging circuit board using the tweezers.
-
-
-
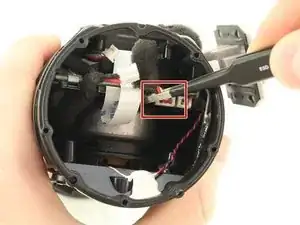
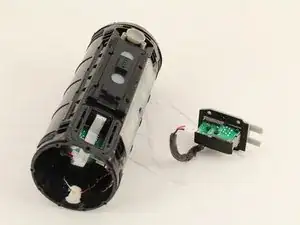
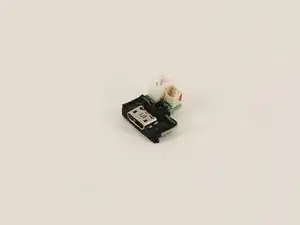
Unhook the small white plug attached to the main circuit board that is holding the USB port to the speaker.
-
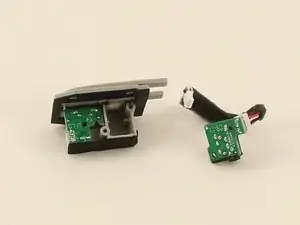
Remove the USB port component from the speaker.
-
-
-
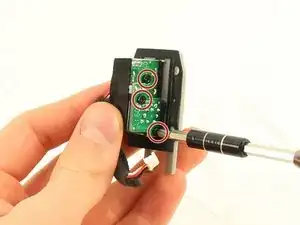
Remove three 9mm Phillips #1 screws holding the two small circuit boards to the USB port component.
-
Pry off the top small circuit board with the plastic opening tool.
-
-
-
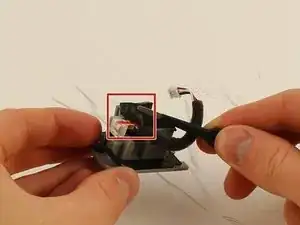
Peel back the black adhesive on the bottom side of the component with the tweezers and remove the wires underneath.
-
Remove the first small circuit board and attached wires.
-


To reassemble your device, follow these instructions in reverse order.
11 comments
Hi, I need to replace this circuit board where the charging port mounts.
While trying to remove damaged micro usb port, I damaged the tiny wires from the circuit board.
I tried to find this online but no luck so far.
Do you know the code for this PCB?
Thank you,
hi, where can i buy new circuit board for micro usb charging port?
please i need 1… thank you.
Important suggested edit to these instructions - make sure to pry off clips/ridges from BOTH sides before attempting removal of the cover.
I interpreted these instructions as saying you only needed to pry clips from one side - then peel off cover. Doing this broke a clip from the other side. Bummer. I'd like others to avoid that.
k9612 -
If you do break a clip - save it. They are relatively easy to glue back into the cover.
k9612 -
My Flip4 had a single long clip on the non-button side that ran the entire length of the rubber spine. The other side (with play/ vol buttons) had three seperate clips (middle and both sides) as mentioned above.
takentrashout -
What if my speaker battery dies very fast and makes weird crackling noise, is it counted as faulty battery?
Jayden Koh -
Yes. I first thought one of the drivers was defective.
Paul Sommer -
What was the fix in the end ?
Jack Mulcahy -
I used the flared edge of a metal measuring spoon handle since I didn’t have an opening tool. Worked great! Replacement battery from iFixit is on order. Thanks for the guide!
Greg -
My battery was glued. Tried it anyway to remove. Battery exploded!!!!
Don't go on if the battery is glued.
darthvader007 -