
Introduction
In the chance that your circuit board stops working, this step-by-step guide will show you how to replace it. For soldering help, follow the How to Solder and Desolder Connections guide.
-
-
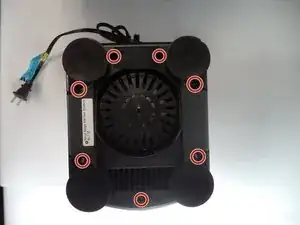
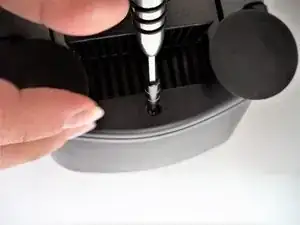
Remove the five screws (13mm long, 6mm head) attaching the Base Cover using a Phillips screwdriver (Ph2).
-
Remove the two screws (13 mm long, 6mm head) attaching the Base Cover using a T10 screwdriver.
-
-
-
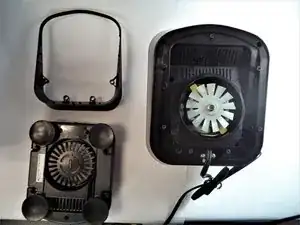
Carefully remove the second layer from the base. You will not need a screwdriver for this step.
-
-
-
Remove the 2 screws (13mm, 6mm head) connected to the plastic piece holding down the power cord.
-
Then remove the additional 4 screws (13mm, 6mm head) and 2 screws (11mm, 5mm head) securing the base.
-
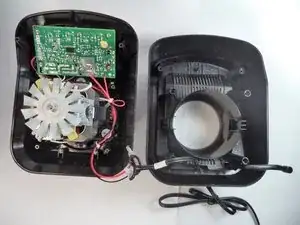
Carefully lift the base up from the rest of the blender.
-
-
-
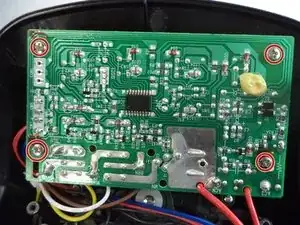
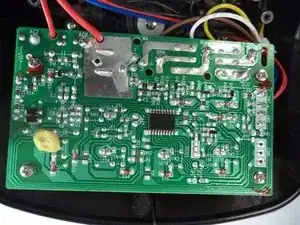
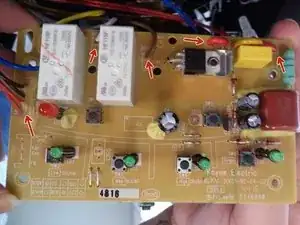
Cautiously desolder all the wires connecting the circuit board to the unit.
-
Carefully slide the circuit board free of the wires are place the new board in.
-
Solder the wires back onto the new board, keeping track of which wire goes where in order for your unit to properly function.
-


To reassemble your device, follow these instructions in reverse order.

14 comments
Thanks for the post… this is helping me with my blender…. by any chance do you have a better picture of the resistor on the back of the circuit board… it seems to be a yellow blue blue gold sequence resistor… my board just burned that resistor and I am trying to find and replace just that resistor if possible… but I am not sure of the colors so I can locate the right now.
Does somebody know where can I buy this circuit board ??
Anyone know the chip on this circuit board?? Proprietary I assume??