Introduction
Parts
-
-
Pry up the small black piece of plastic located between the volume [-] button and the HOLD/ON button.
-
-
-
Underneath the piece of plastic you just removed, there is a small screw (Phillips #000, 2.0 mm long). Use a Phillips #000 screwdriver to remove it.
-
-
-
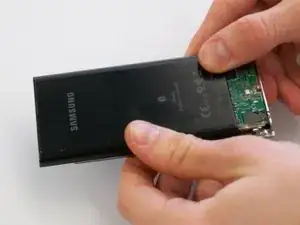
Push on the backplate with both thumbs, sliding it towards the top of the device.
-
Once it begins to move, lift up slightly. You can then slide the backplate all the way off.
-
-
-
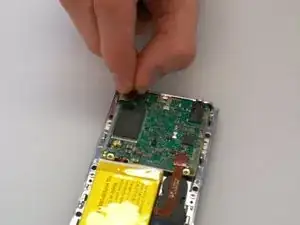
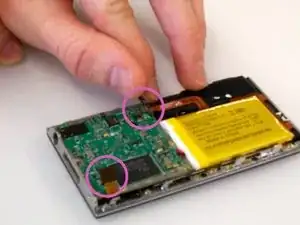
Before removing the circuit board, we must remove the ribbon-like wires attached to two sides of the circuit board.
-
There are two screws (Phillips #000, 2.0 mm long) holding in the circuit board. Use a Phillips #000 screwdriver to take out those screws.
-
-
-
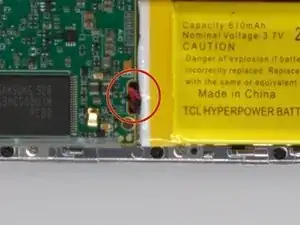
The battery is also attached to the circuit board by a cable. The cable is difficult to disconnect with both components in place. It's best to lift the circuit board out partially to give yourself more room to disconnect the connector.
-
The wire that is connected to the circuit board is connected by a plastic piece with two metal prongs.
-
Use the pointy end of the spudger to place in between the computer board and the plastic piece and gently pry the prongs away from the circuit board.
-
-
-
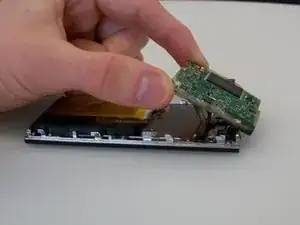
Finally, disconnect the ribbon cable on the bottom of the circuit board. You can then lift the circuit board all the way out.
-


To reassemble your device, follow these instructions in reverse order.