Introduction
-
-
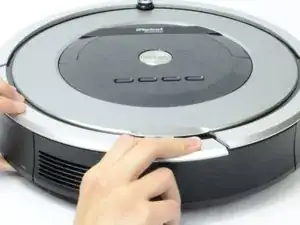
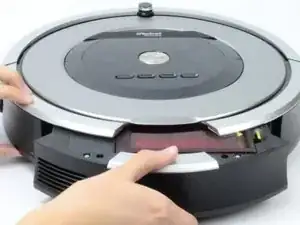
To remove the debris extractor, first begin by removing and emptying the trash bin.
-
Push down and pull out on the silver button located on the top of the Roomba in the back.
-
The trash bin should then slide out.
-
-
-
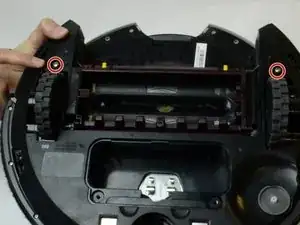
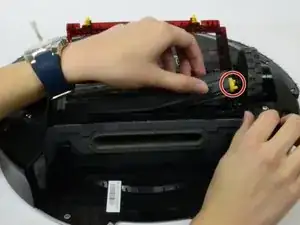
With the Roomba upside down, locate the two yellow buttons by the extractor.
-
To open the flap holding the extractos in place, pinch the two yellow buttons together towards the center and pull up on the flap at the same time
-
-
-
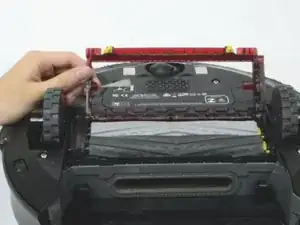
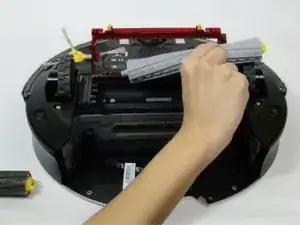
Once the flap is open, grab the yellow end of the dark gray extractor and pull up slightly.
-
After lifting it up about an inch, pull it out towards one of the side wheels.
-
The extractor should slide out with ease. Repeat the same procedure for the light gray debris extractor.
-
-
-
To remove the Side Wheel Assembly, start by locating 2 15mm Phillips #2 Point screws above the wheels.
-
Remove the screws and pull up on the plate surrounding the side wheels.
-
-
-
Locate and remove 3x Phillips #0 Point Screws located behind the yellow side brush, bottom let corner of heel assembly, and on the outside of the wheel assembly.
-
-
-
With all the screws removed, lift up on the side wheel assembly to remove it from the Roomba housing.
-
The other wheel can be removed and replaced the same way
-


To reassemble your device, follow these instructions in reverse order.