Introduction
This manual will guide you through the steps involved in successfully removing the components of your Zune. This includes the hard drive, battery, screen, logic board, etc.
-
-
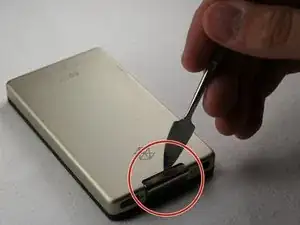
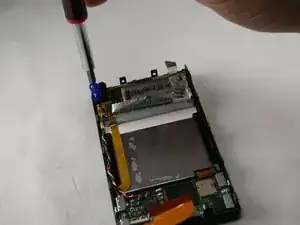
Use a metal spudger or Zune opening tool to remove the small silver plastic cap located on top of the device.
-
-
-
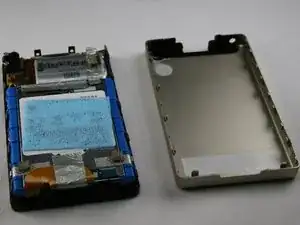
Using a metal spudger or Zune opening tool, remove the aluminum backing starting from the top. There are five clips on each side and two on the bottom.
-
-
-
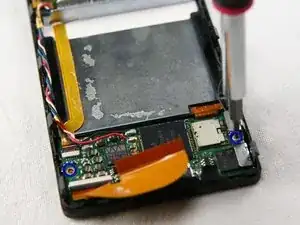
Remove the silver tape from the bottom center and the top right of the device. This allows access to the hard drive and the battery.
-
-
-
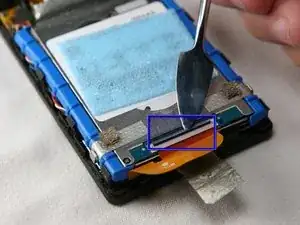
Unclick the black bar connecting the orange hard drive cable to the bottom of the hard drive.
-
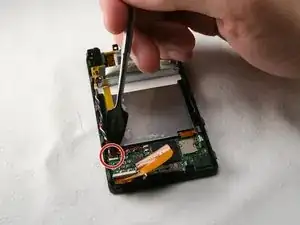
Gently push towards the bottom of the device on the black bar until you hear a click sound. It is now disengaged from the hard drive.
-
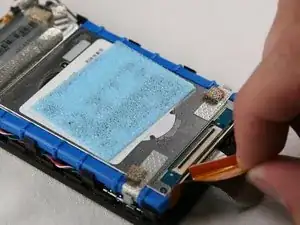
Now, gently pull the orange hard drive cable to remove it from the hard drive cable.
-
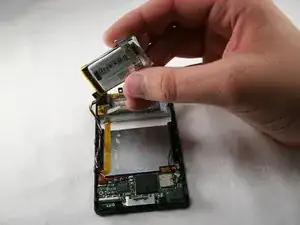
Lift the hard drive out of the device.
-
-
-
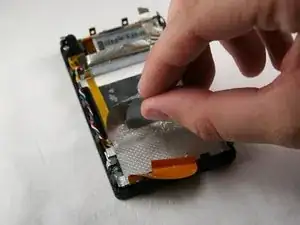
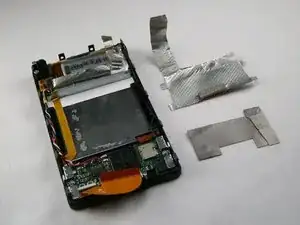
Remove two more pieces of silver tape from the bottom of the device. One of these pieces is below the other.
-
-
-
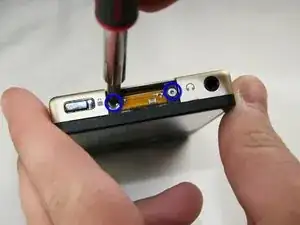
Remove the two T4 screws holding the headphone jack receiver on the top left corner of the device.
-
-
-
Remove the two T4 screws holding the metal brackets on both sides of the bottom of the device.
-
Remove the screws, brackets, and clips from the device. These are small pieces, so put them in a safe place.
-
-
-
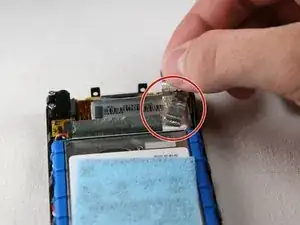
The orange audio board cable is clipped in with a small black bar, like the hard drive cable.
-
Un-clip the bar by pushing upwards on the edge of the black bar towards the orange cable. You will hear it click when it disengages.
-
-
-
Flip the black bar to unclip the left side of the hard drive cable. You may now remove the hard drive cable.
-
-
-
Remove the two T4 screws that hold the charging port on the bottom of the device.
-
Remove the charging port.
-
-
-
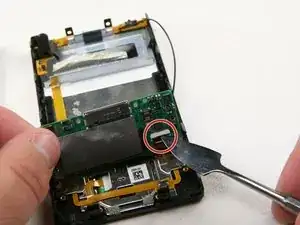
Remove the battery from the device with the cables still connected.
-
Carefully lift up the logic board located at the base of the Zune.
-
Unclip the orange ribbon cable in the same manner as in the previous steps.
-
Remove the logic board from the Zune, leaving the black wire connected.
-
-
-
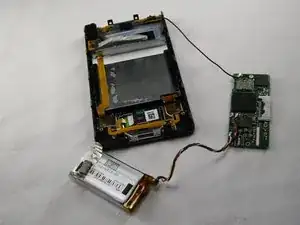
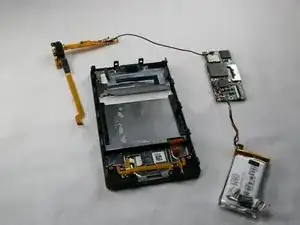
Carefully remove the wireless assembly that runs along the top and upper left edges of the Zune.
-
Remove the assembly and the battery together as one unit.
-


One comment
you can do the same with Zune 120, 4, 8 and 16